Kato N Scale FP7A ESU LokSound plus WVD Adapter Board DCC Decoder Installation
|
Streamlined Backshop offers a variety of services including DCC decoder installations.
I have been blessed with more work than I can accomplish and simply don't have time to accept every opportunity I am presented.
One of my favorite proverbs is "give a man a fish and you feed him for a day; teach a man to fish and you feed him for a lifetime".
With these thoughts in mind, I present this information for those who want to give it a go but struggle with the how to.
For this group of modelers, this is how I do it.
The same basic products, tools and techniques can be applied to nearly any model of the same genre so be sure to look at the forest, not just the trees.
Be sure to visit my online train store, www.SBS4DCC.com today where you can purchase this model and everything you will need to complete the decoder installation as described!
|
In December 2017, Kato released the exquisite Olympian Hiawatha set complete with Super Dome and Skytop Lounge Observation, powered by a new model locomotive, the EMD FP7A.
The new model is very similar in construction to current releases of the F2, F3, and F7 models in a variety of road names.
The model can be reasonably labeled as DCC compatible although it was not intentionally designed for sound installations.
TCS and Digitrax both offer circuit board replacement "drop-in" decoders for the model but they are not sound decoders.
|
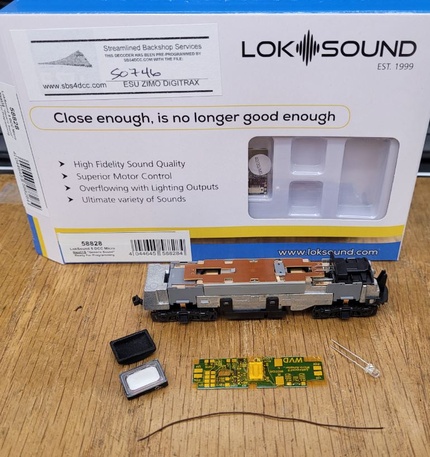
Recommended Tools and Supplies
|
There are a few tools and supplies recommended for performing this decoder installation.
Tools:
Wire Strippers
Hobby Knife
Soldering Iron
Motor Tool
Multimeter
Supplies:
|
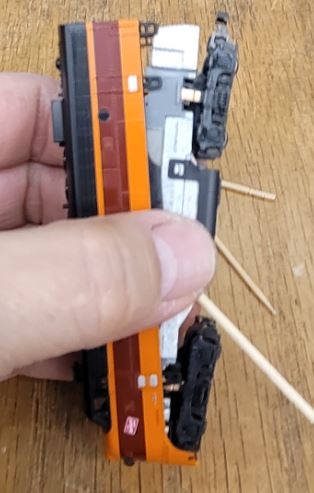
Taking this model apart is very simple.
The shell simply snaps on to the frame. Insert a couple of tooth picks in the gap between the frame and window inserts near the pivot point of the trucks and gently lift the frame out of the body shell.
|
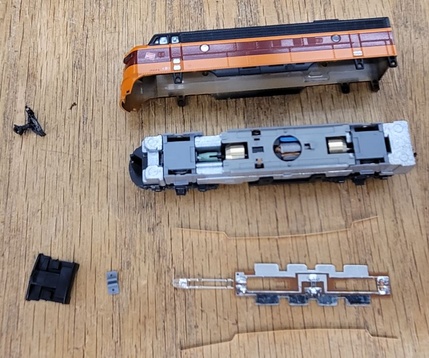
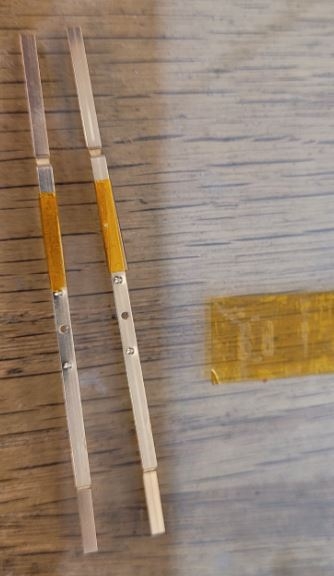
Next remove the cab interior/light shield and grey retainer clip that locks the circuit board in place. With the clip removed, the circuit board slides out of the cradle and the two phos-bronze pickup strips can be taken out.
|
Be aware the front coupler and clip with probably come apart when you lift the shell off. Try to handle it gingerly so as not to damage the paper-thin phos-bronze spring plate.
|
Speaker Modifications and Assembly
|
The trick on this project is to measure the available space between the shell and the ledge above the weight block at the back of the frame.
I like to begin this installation by modifying the circuit board.
Since the front headlight is illuminated by LED and Kato went to the trouble of tinting the lens to an acceptable shade that produces a nice warm white, "incandescent" glow, I will just use the LED, circuit board and light pipe as supplied with a few minor modifications.
|
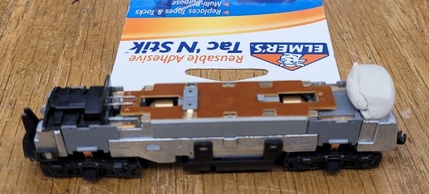
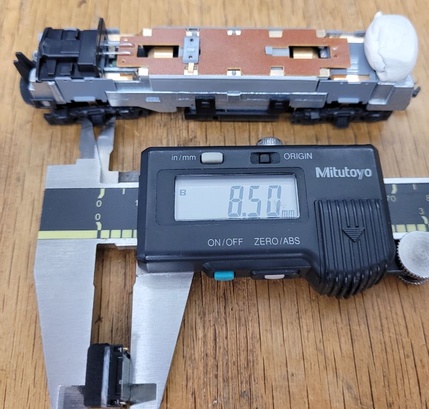
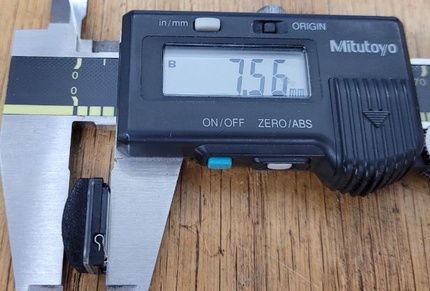
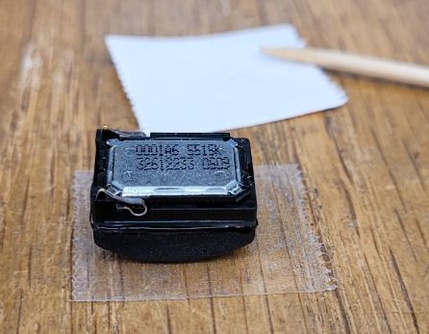
To measure a blind space, I place a piece of poster tack in the gap then reassemble the model to compress the tack to fit the space. I disassemble the model and then measure the tack (7.5mm in this example) and the stock speaker assembly (8.5mm in this example). Using this method, I have determined that the speaker is 1mm taller than the available space.
|
Next, I use a file to sand down the mating face of the baffle 1mm. I do this a lot and have also used a hobby knife and my mill to modify the baffle.
|
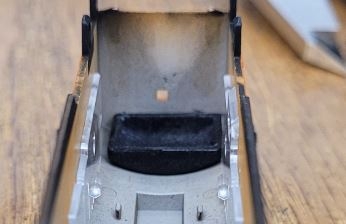
I continue to remove material until I get to the desired height of about 7.5mm.
|
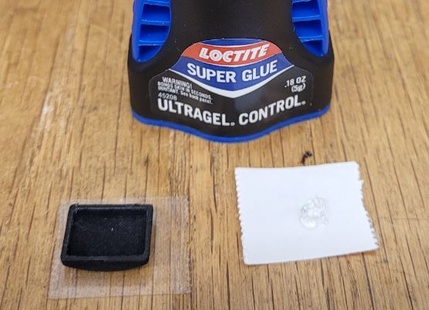
I assemble the baffle to the speaker using Gel-type super glue. Apply a bead of glue tot he rim of the baffle with a toothpick an
|
Apply a bead of glue to the rim of the baffle with a toothpick and assemble the speaker to the baffle.
|
I like to wipe the seam where the baffle and speaker meet to seal joint well.
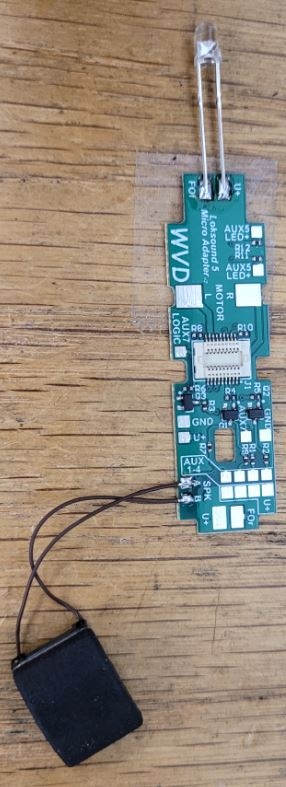
Finally, I attach (4) six-inch leads of black wire at the points shown. Two of the leads are for the headlight and two are for power pickup.
It is important to note that you do not have to add the two wires for power pickup.
There are a few options for power pickup with this model since Kato has used a powered drawbar connection and included two-truck pickup in tender.
You could attach wires to the brass strips in the tender or you could connect to both chassis and tender for even better long-term performance.
I have elected to connect to only the chassis pickups since the drivers stay the cleanest, the model has a powered drawbar, and I will be adding a small "keep-alive" capacitor to the decoder.
You can substitute the appropriately colored wire per the NMRA spec but I prefer the look of the black wire since a small portion will be exposed between the cab and tender.
It is handy to mark the wires in some way or else you will have to try to figure out whats what later in the process.
|
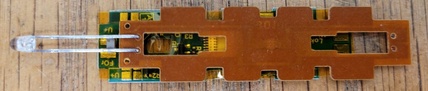
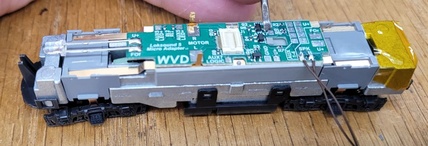
The next step is to prepare the adapter board for the installation.
For this install, I am keeping it simple and reusing the OEM Front Headlight LED.
|
I just use a set of rail nippers to cut the LED leads and solder it to the adapter bard as required. I used a scrap of wire to make leads for the speaker and attached it to the adapter board as required.
|
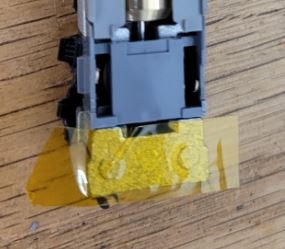
Finally, I use another strip of Kapton tape to insulate the frame where the speaker will sit.
|
Installation and Final Assembly
|
Reassembly of the model is pretty straight forward.
Spread the motor tabs wide and seat the pickup strips back in the gray plastic motor cradle.
|
Technically you should be able to re-use the gray clip to pin them to the board but experience has proven the only reliable way to do this is to solder them in place.
|
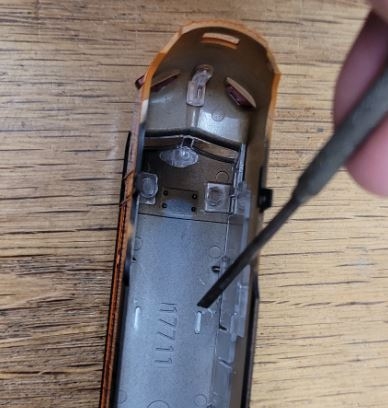
The last step of the project is to remove the two small protrusions on the inside of the shell. The shell will interfere with the decoder and not sit properly if you forget to do this.
|
Now just reassemble the shell to the frame and reinstall the coupler as required. Be careful of the phos-bronze spring strip; it is really pretty fragile.
|
The Test Run and Demonstration
|
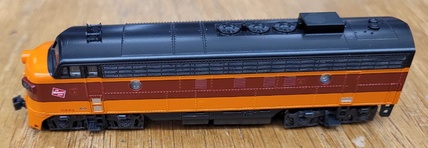
So with that, the install is complete. Time to pour a glass and celebrate.
Or, if you are like me, curse, swear and try to sort out everything that wasn't quite as easy as it sounded here.
Once everything tests out and the job is done, you should be able to enjoy the sights and sounds just like the engine in this demonstration video.
N' Joy!
|
|
|